





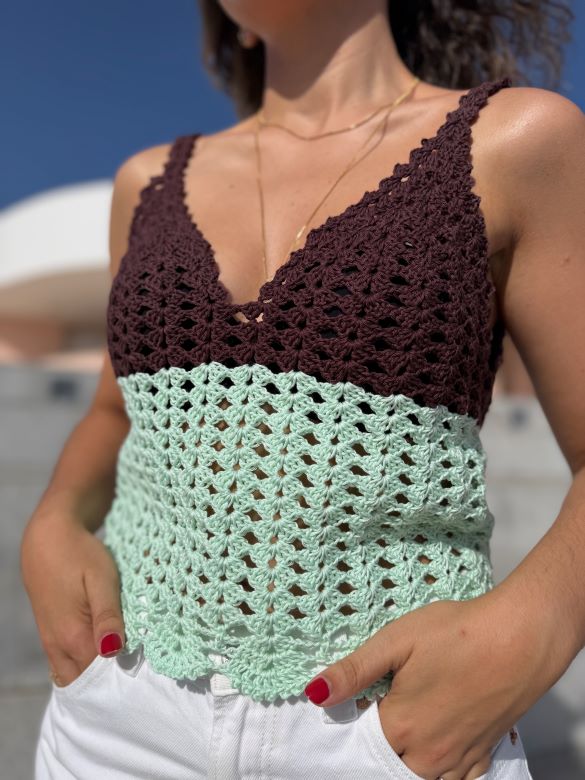
Contrast Top
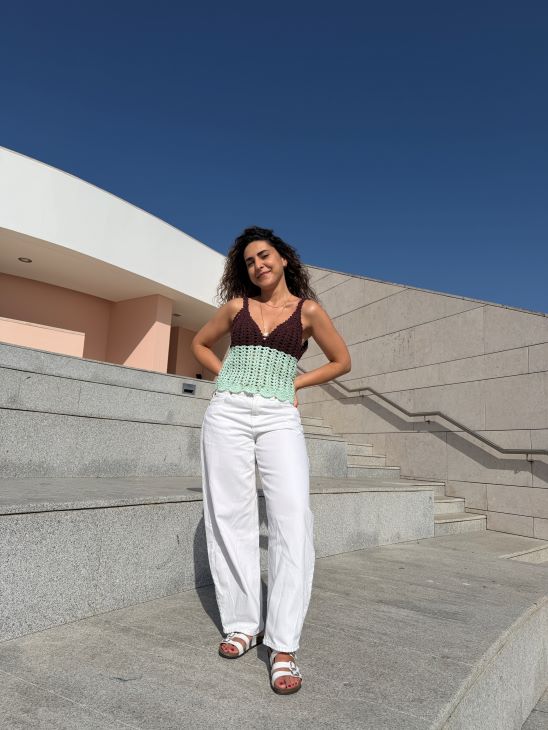
MATERIAIS
- 1 skein of Charme – color 7311 Tabaco
- 1 skein of Charme – color 2204 Verde-Candy
- 3.5 mm crochet hook
- Scissors
- Measuring tape
- Tapestry needle
EXECUÇÃO
Skill Level: Intermediate
Size: S
Approximate Yarn Usage:
XS, S, M, and L: 1 skein of each color
XL and XXL: 1 skein of Tabaco and 2 skeins of Verde-Candy
This garment is made in 2 identical sections (right side and left side), worked separately and joined afterwards.
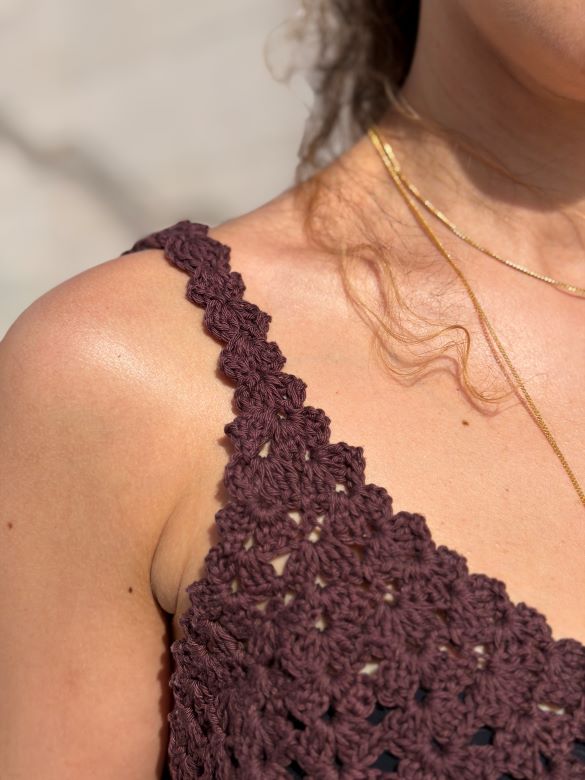
Strap
Row 1: Using Tabaco color, ch 4. Return to the first ch and work: 2 dc, ch 2, 3 dc (1 shell made).
Row 2: Turn, work 3 sl st until reaching the shell center space, ch 3 and work: 2 dc, ch 2, 3 dc.
Rows 3–7: Repeat Row 2 until completing 7 rows total.
Cup Construction
Row 8: Turn, work 2 sl st until reaching the 3rd dc, ch 3 and work into the center space: 2 dc, ch 2, 3 dc, ch 2, 2 dc. Work 1 dc into the next dc.
Row 9: Turn, work 3 sl st until reaching the first space, ch 3 and work: 1 shell in the first space and 1 shell in the next space. (2 shells total.)
Row 10: Turn, work 3 sl st until reaching the space and work: shell over shell and 1 dc between both shells.
Row 11: Turn and work: shell over shell, shell over dc, shell over shell. (3 shells total.)
Row 12: Turn and work: 1 shell, 1 dc, 1 shell, 1 dc, 1 shell.
Row 13: Turn and work shell over shell and shell over dc until the end of the row. Finish with 5 shells.
Row 14: Turn and work: 1 shell, 1 dc, 3 shells, 1 dc, 1 shell.
Row 15: Turn and work shell over shell and shell over dc until completing 7 shells.
Rows 16–18: Work 3 more rows maintaining 7 shells.
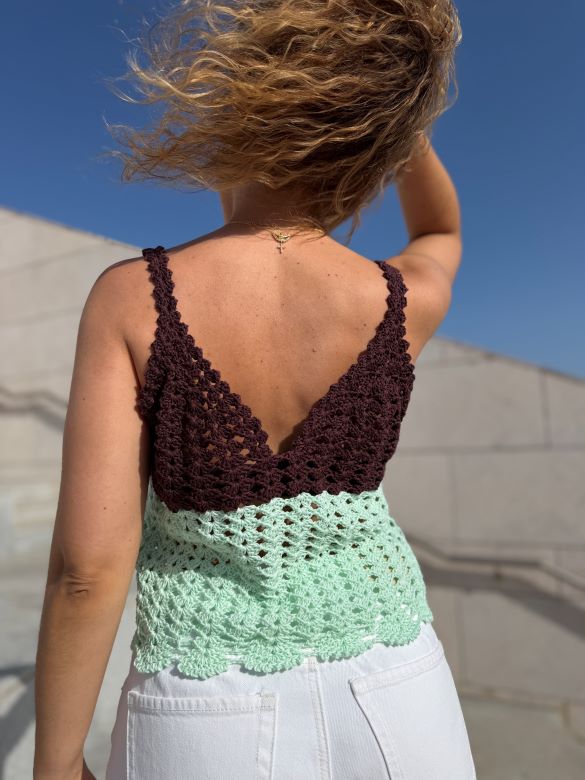
Back Section
Return to the beginning of the piece where the strap chains were started. Attach a new strand of yarn, ch 3 and work the same instructions to form the back section.
Repeat the entire process for the left side. Do not fasten off.
Notes
If additional cup height is needed, continue working more rows following the same stitch logic until reaching approximately the lower bust area or desired height.
If additional width is needed, continue the increases following the stitch logic by working additional increase dc to create more shells in the following rows.
Joining and Body Length
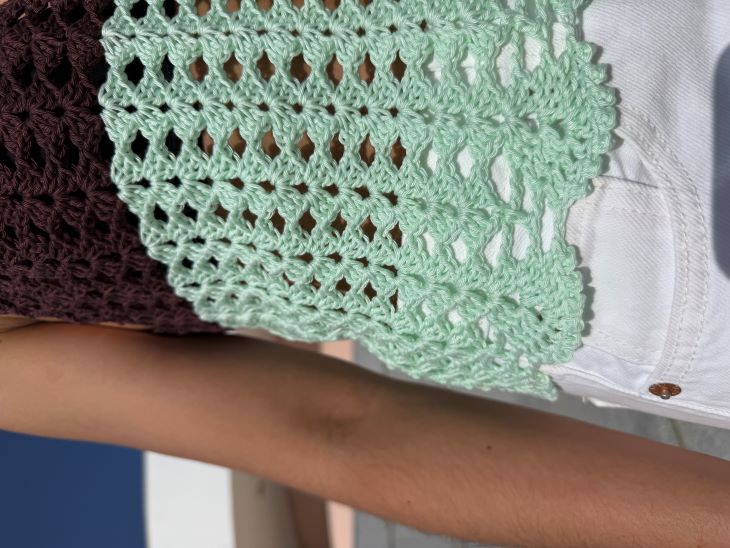
Row 20: Turn your work and work shell over shell, completing 7 shells. At the end of the row join the next section and work 1 shell directly into the first space. Continue working shell over shell and join the next section at the end. Repeat until all sections are joined. Finish with 1 sl st into the 3rd ch.
Rows 21–22: Work 3 sl st until reaching the shell center space, ch 3 and work shell over shell for 2 rounds or until reaching approximately the lower bust area. Always finish with 1 sl st into the 3rd ch, work 3 sl st to walk to the shell space and ch 3 to begin the next round.
Rows 23–34: Change to Verde-Candy color and work 12 more rounds shell over shell. Finish with 1 sl st into the 3rd ch. Fasten off.
Border
Row 35: Work 1 shell over the first shell, ch 3, 1 sc over the next shell, ch 3, 1 shell over the next shell. Repeat around. Finish with 1 sl st into the 3rd ch.
Row 36: Work 1 sl st until reaching the 2nd dc of the shell, ch 3 and work: 1 dc into the next st, 2 dc into the center space, ch 2, 2 dc into the center space and 2 dc over the next 2 sts. Ch 1, work 1 dc into the sc from previous row, ch 1. Into the next shell work: 4 dc, ch 2, 4 dc. Repeat around. Finish with 1 sl st into the 3rd ch.
Row 37: Work 1 sl st, ch 3 and work: 2 dc picot, 3 dc picot into the center space, 2 dc picot into the next sts and 1 regular dc. Ch 1 and repeat into the next motif. Finish with 1 sl st into the 3rd ch.
Designer: Joana Gouveia @fioscruzados
PRODUTOS USADOS NESTA RECEITA
RECEITAS QUE VOCÊ TAMBÉM VAI GOSTAR