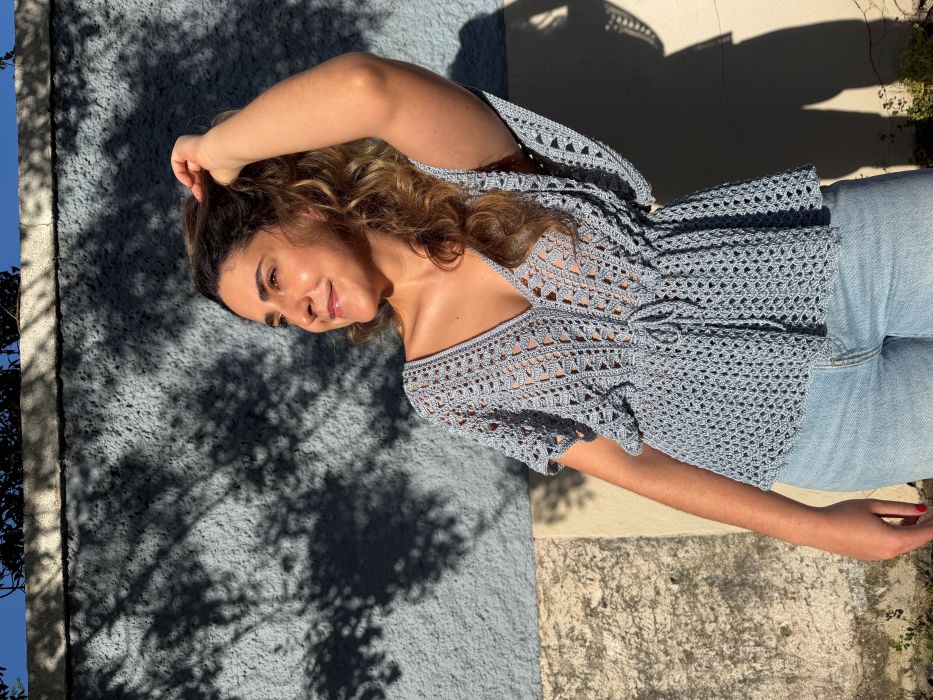
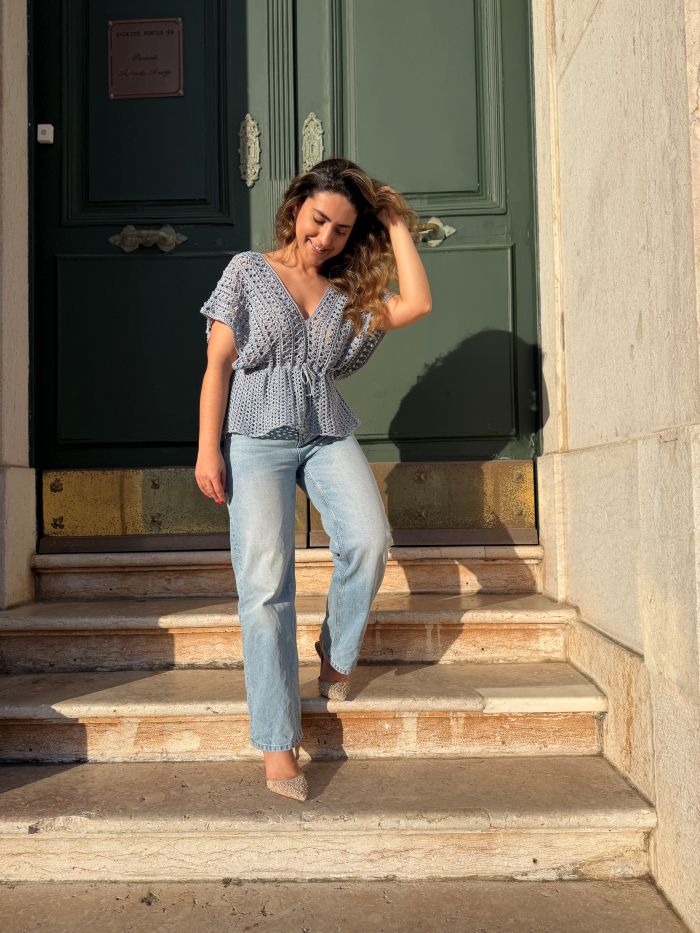
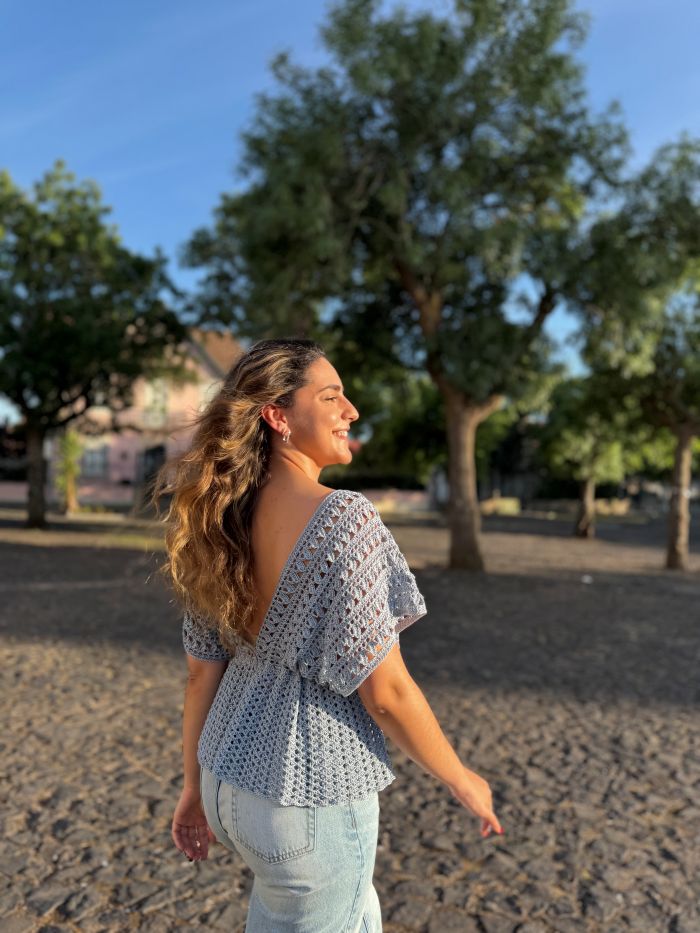
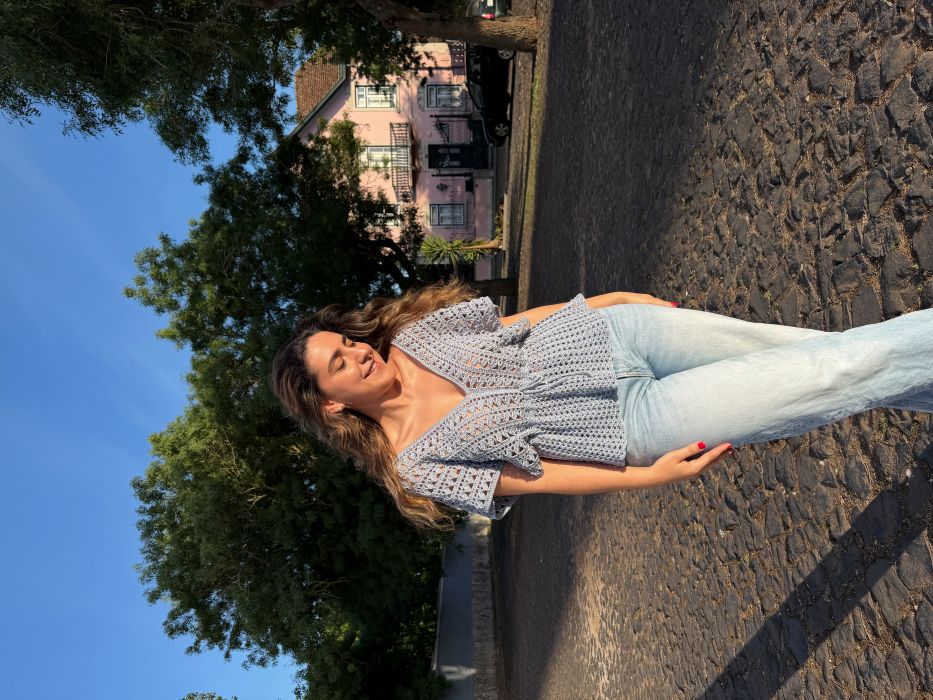
Shell Top


MATERIAIS
- 3 skeins of Queen Duplo yarn – color 2463
- 3 mm crochet hook
- Scissors
- Tapestry needle
EXECUÇÃO
Skill Level: Intermediate
This blouse is constructed in three parts: two identical rectangles for the upper section, followed by the body worked in the round. Begin by making one of the rectangles.
Before starting, take a measurement: measure from the underbust, over the shoulder, to the back at the same level as the front. This measurement corresponds to the height of the rectangle, approximately at the ribcage area.
Based on this measurement, make a foundation chain to the desired length. This chain defines the height of your rectangle.
Rectangle (make 2)
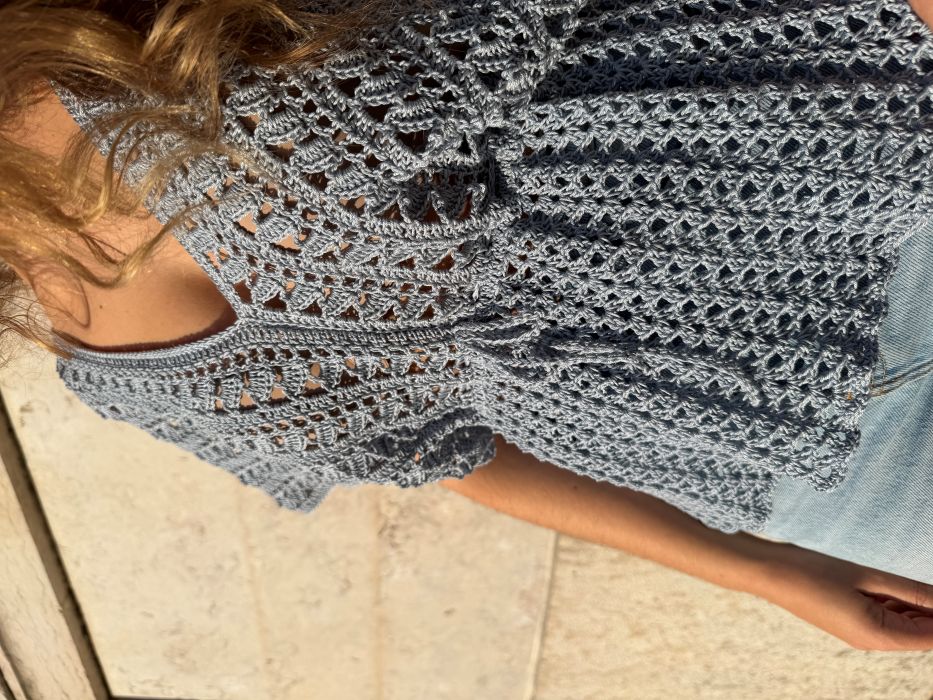
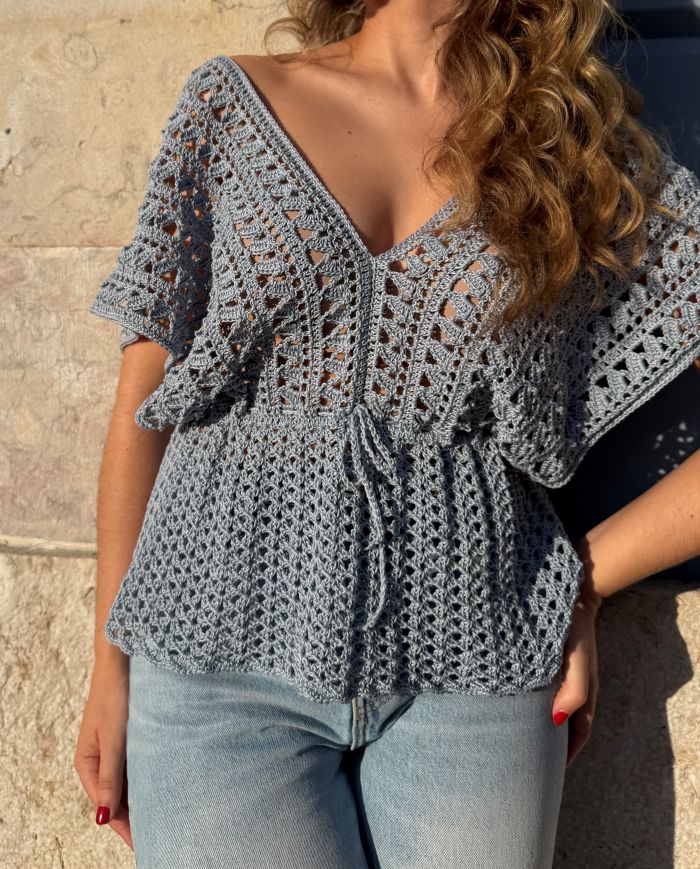
Row 1: Ch 3 (counts as first dc), turn and work 1 dc in each chain across. The total number of stitches must be odd (e.g., size S: 147 dc).
Row 2: Turn, ch 4 (counts as 1 dc + ch 1), skip 1 st, dc in next st, ch 1. Repeat from * to * across, ending with 1 dc.
Row 3: Turn, ch 3, dc in next st, ch 3, work 5 dc around the last dc made (forming a shell), sc in next dc. Repeat from * to * across. End with 1 sc in the top of the initial ch-3.
Row 4: Turn, ch 5, sc in top of next ch-3 space, ch 3, sc in top of next ch-3 space.
Repeat from * to * across. End with 1 sc, ch 1, and 1 tr in the top of the initial ch-3.
Row 5: Turn, ch 3 (counts as first dc), then work dc as follows: 1 dc in first space, 1 dc in next st, 3 dc in next space, 1 dc in next st. Repeat across, ending with 1 dc in the last space and 1 dc in the top of the initial ch-3.
At the end of this row, you should have the same number of stitches as Row 1 (e.g., 147 dc).
Repeat rows 2 to 5 until you reach half of your bust width.
You may adjust the number of repeats depending on the desired sleeve length (e.g., 6 pattern repeats).
Make a second identical rectangle.
Joining the rectangles
At the end of the second rectangle, do not cut the yarn.
Fold the rectangle in half and join the underarm (armhole) edges using slip stitches (sl st), joining the front and back of the same rectangle.
Ch 3 and begin working dc along the bottom edge of the rectangle. Distribute stitches evenly across the spaces (e.g., 2 dc, 3 dc, 3 dc as needed) to ensure a balanced join.
When you reach the end of the first rectangle, position the second rectangle and join the back section by working dc while inserting the hook through both rectangles at the same time, completing the stitch normally.
Continue working dc across the second rectangle until you reach the next armhole, where you will again join the front and back of the same rectangle using dc.
Continue working dc to the center front and join both rectangles at the front in the same way, working dc through both sides.
Continue around until the round is complete and join with sl st to the top of the beginning ch-3.
Ch 3 and work one more round of dc, one stitch in each stitch around.
Join with sl st.
Body
Ch 3 and, in the same stitch, work a shell: (2 dc, ch 2, 2 dc)
Skip 3 stitches, in the 4th stitch work a shell (2 dc, ch 2, 2 dc). Repeat from * to * around.
Join with sl st.
Repeat this pattern (shell over shell) until the desired length is reached (approx. 16 rounds).
Finish with 1 round of sc.
Finishing
Work 1 round of sc around each sleeve and the neckline.
If the neckline feels too deep, you may join the front slightly on the wrong side using slip stitches, then work the finishing round of sc.
Cord
Using double yarn, make a chain approximately 120 cm long.
Thread it through the dc round at the waist to create a belt that defines and shapes the blouse.
Designer: Joana Gouveia